Custom Menubars-Starting Code
The following code sample is a good starting point to begin writing our code. You can copy and paste this sample into your ASI WebLink project as a starting point on any new project. Then you can just edit it to fit your needs.
//Build the custom menu bars
//
//call this function in the OnShow tab of every webview
function loadCustomMenus() {

//FIRST, declare each custom menubar as a variable
//first number is header width, second number is item width,
var hdr1Menu = new NavBarMenu(80, 125);
var hdr2Menu = new NavBarMenu(90, 155);

//SECOND, create content for menubar, keep each variable separated
//first instance creates header, subsequent instances create drop-down items
//second argument of items is for the onClick event
//edit the Goto() function as needed
hdr1Menu.addItem(new NavBarMenuItem("Menu 1", ""));
hdr1Menu.addItem(new NavBarMenuItem("Item 1", "javascript:Goto('main')"));
hdr1Menu.addItem(new NavBarMenuItem("Item 2", "javascript:Goto('main')"));
hdr1Menu.addItem(new NavBarMenuItem("Item 3", "javascript:Goto('main')"));

hdr2Menu.addItem(new NavBarMenuItem("Menu 2", ""));
hdr2Menu.addItem(new NavBarMenuItem("Item 1", "javascript:Goto('main')"));
hdr2Menu.addItem(new NavBarMenuItem("Item 2", "javascript:Goto('main')"));

//THIRD, add custom menubars to the default menubar
//the order you list them is the order they will appear, left to right
menuBar.addMenu(hdr1Menu);
menuBar.addMenu(hdr2Menu);
}
Fig. 7 loadCustomMenus() Function
Placement
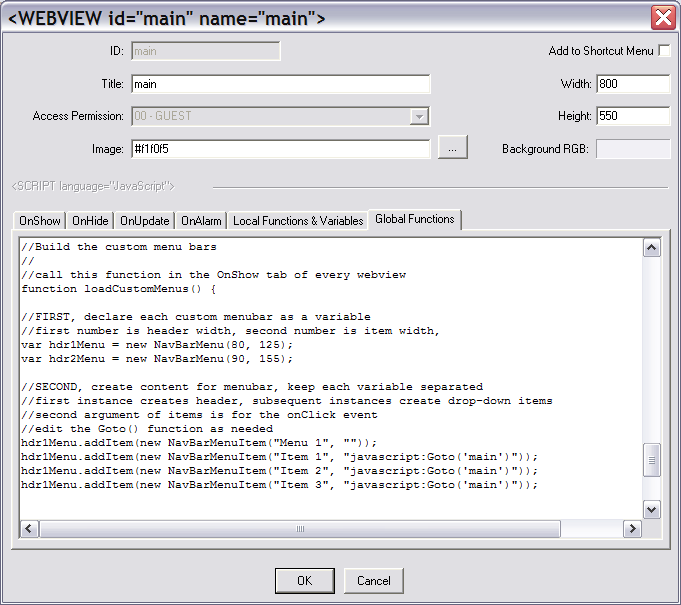
Copy and paste the code above into the Global Functions tab from any webview on your project.
 Fig. 8 loadCustomMenus() Function loaded into Global Functions tab
Then put the call to invoke the function into the OnShow tab of each webview where you want the custom menubars visible.
loadCustomMenus();Fig. 9 Invoke loadCustomMenus() function
 Fig. 10 Invoke loadCustomMenus() function in OnShow tab
Starting Code
We need to break down the three sections of the starting code. Before we do that, let's take a look at how the initial code renders.
 Fig. 11 Initial code rendered in a session
You can see how the header drops down to reveal the items, and that they change color when they have the cursor hover over them. It is not very functional yet, but it is working.

